By Focus Camp Expert Coaching Team
Introduction: Who This Guide Is For
If you’ve ever stood at the edge of a swimming pool, feeling that familiar knot of anxiety tighten in your chest while watching others glide effortlessly through the water, you’re not alone. Learning to swim as an adult is one of the most common aspirations—and fears—that we encounter at Focus Camp here in Los Angeles. Whether you’re 25 or 65, it’s never too late to transform your relationship with water, and this comprehensive 4-week guide will walk you through every step of that journey.
This guide is specifically designed for adults who have never learned to swim, those who had traumatic experiences in water as children, and anyone who can “sort of” swim but lacks confidence in their abilities. We understand that adult learners face unique challenges: you may feel embarrassed about not knowing how to swim, you might have developed deep-seated fears over decades, or you simply never had the opportunity to learn during childhood. These are all valid concerns, and they’re exactly why we’ve developed this structured, compassionate approach to adult swimming instruction.
Living in Los Angeles gives you incredible access to beaches, pools, and water activities—from Santa Monica’s shores to backyard pools in the Valley. Not knowing how to swim means missing out on family beach days, pool parties, and the incredible health benefits that swimming offers. More importantly, it’s a safety issue. According to the CDC, there are approximately 4,000 fatal unintentional drownings annually in the United States, and adults who never learned to swim are at significantly higher risk.
At Focus Camp, we’ve helped hundreds of adults in Los Angeles overcome their fear of water and become confident swimmers. Our approach combines personalized coaching, mindfulness techniques, and proven progression methods that respect your pace while ensuring steady progress. This guide distills our expertise into a practical, week-by-week plan that you can follow with a qualified instructor or, for some components, practice independently.
What makes this guide different from generic swimming tutorials is its foundation in real-world experience with adult learners. We understand that your body moves differently than a child’s, your fears are more complex, and your learning style has evolved. This isn’t about throwing you into the deep end—it’s about building genuine water confidence through understanding, technique, and consistent practice.
Who Should Read This Guide
• Adults (18+) who cannot swim at all and want to learn from scratch
• Adults who can swim but panic in deep water or cannot float
• People who had negative water experiences in childhood and avoided swimming since
• Los Angeles residents who want to enjoy local beaches and pools safely
• Parents who want to set a positive example for their children
• Fitness enthusiasts looking for a low-impact, full-body workout option
• Anyone preparing for a vacation involving water activities
• Adults seeking to overcome aquaphobia (fear of water)
Step-by-Step 4-Week Swimming Plan
This comprehensive 4-week plan is designed to take you from complete beginner to confident swimmer through progressive skill building. Each week focuses on specific foundational skills that build upon the previous week’s achievements. The plan assumes you’ll practice 3-4 times per week for 45-60 minutes per session, though you can adjust the pace based on your comfort level and schedule.
Week 1: Water Comfort and Floating Fundamentals
Your first week is entirely about developing a comfortable relationship with water. Many adults rush past this crucial phase, but we’ve found that spending adequate time here dramatically accelerates progress in later weeks. The goal isn’t to swim—it’s to feel safe, relaxed, and in control while in the water.
Day 1-2 focuses on pool orientation and water acclimation. Start by simply walking in shallow water (waist-deep), getting used to the feeling of water pressure against your body. Practice submerging your hands, then your arms, experiencing how water supports your weight. Move to chest-deep water and practice bobbing—taking a breath, submerging your face briefly, and exhaling underwater through your nose or mouth. This fundamental skill teaches you that you can breathe even with your face in water.
Day 3-4 introduces floating concepts. The key insight that transforms most adults’ swimming journey is understanding that human bodies naturally float. Your lungs act like internal balloons, providing buoyancy. The reason people sink is usually tension and improper body position, not body composition. Practice wall-supported floating: hold the pool edge, extend your body horizontally, face down, and relax completely. Feel how the water supports you.
Day 5-6 moves to independent floating attempts. Start with the front float (also called prone float or star float). Take a deep breath, place your face in the water with arms and legs extended, and relax every muscle. The most common mistake is lifting your head—this causes your hips to sink. Keep your face down, looking at the pool bottom. Your ears should be underwater. Hold for 5-10 seconds initially, gradually extending to 30 seconds.
Day 7 is for review and confidence building. Practice all skills learned, focusing on relaxation and breathing. By the end of Week 1, you should be comfortable with your face in the water, able to hold a front float for at least 15 seconds, and feel significantly more relaxed in the pool environment.
Week 1 Progress Checklist:
| Skill | Target | Your Progress |
| Water comfort (waist-deep) | Completely relaxed | [ ] Not started [ ] In progress [ ] Achieved |
| Face submersion | 10 seconds continuous | [ ] Not started [ ] In progress [ ] Achieved |
| Bobbing with rhythmic breathing | 10 repetitions | [ ] Not started [ ] In progress [ ] Achieved |
| Wall-supported front float | 30 seconds | [ ] Not started [ ] In progress [ ] Achieved |
| Independent front float | 15 seconds | [ ] Not started [ ] In progress [ ] Achieved |
| Back float (introduction) | 5 seconds with support | [ ] Not started [ ] In progress [ ] Achieved |
Week 2: Breathing Mastery and Back Floating
Week 2 builds on your newfound water comfort by focusing on the skill that most adults struggle with: breathing. Proper breathing technique is the foundation of all swimming strokes and the key to swimming continuously without exhaustion or panic. This week also introduces back floating, which many adults find easier than front floating.
The golden rule of swimming breathing is simple but counterintuitive: always exhale underwater. Many beginners hold their breath while their face is submerged, then try to both exhale and inhale when they lift their head. This creates a breathless, panicked feeling. Instead, you should be continuously exhaling through your nose or mouth while underwater, so that when you turn your head or lift it, you only need to inhale.
Days 1-2 focus on stationary breathing practice. Stand in chest-deep water and practice the rhythm: inhale through your mouth above water, submerge your face, exhale continuously through your nose underwater, then surface and inhale again. Start with a 3-second exhale, gradually extending to 5-7 seconds. The goal is to make this rhythm automatic, requiring no conscious thought.
Days 3-4 introduce side breathing while holding the wall. This is the foundation of freestyle breathing. Hold the pool edge with one hand, extend your body horizontally, and practice turning your head to the side (not lifting) to breathe. Your ear should stay in the water; only one goggle should emerge. Inhale quickly through your mouth, then return your face to the water and exhale. Practice on both sides.
Days 5-6 focus on back floating development. Back floating is often easier for anxious adults because your face remains above water. Start by holding the wall, leaning back, and extending your body. The key is keeping your ears submerged—lifting your head causes your hips to sink. Relax your neck completely; the water will support your head. Practice transitioning from front float to back float by tucking your knees, rolling, and extending.
Day 7 combines skills: practice floating sequences (front float, transition to back float, return to front float) while maintaining relaxed breathing. By week’s end, you should be comfortable with both floating positions and have developed a natural breathing rhythm.
Week 2 Progress Checklist:
| Skill | Target | Your Progress |
| Stationary rhythmic breathing | 20 repetitions continuous | [ ] Not started [ ] In progress [ ] Achieved |
| Side breathing at wall | 10 breaths each side | [ ] Not started [ ] In progress [ ] Achieved |
| Independent back float | 20 seconds | [ ] Not started [ ] In progress [ ] Achieved |
| Front-to-back float transition | 3 smooth transitions | [ ] Not started [ ] In progress [ ] Achieved |
| Breathing while floating | 5 breath cycles | [ ] Not started [ ] In progress [ ] Achieved |
| Treading water (introduction) | 15 seconds | [ ] Not started [ ] In progress [ ] Achieved |
Week 3: Kick Development and Arm Movement Basics
Week 3 introduces propulsion. You’ve learned to float and breathe—now it’s time to move through the water. This week focuses on developing an efficient flutter kick and basic arm movements, the building blocks of freestyle swimming.
The flutter kick is deceptively simple but often performed incorrectly. Common mistakes include: bending knees too much (bicycle kick), kicking from the knees rather than the hips, kicking too wide, and kicking too hard. An efficient flutter kick originates from the hips, with relatively straight legs and relaxed ankles. Your feet should create small splashes, not large ones—big splashes indicate wasted energy.
Days 1-2 focus on kick mechanics. Start at the wall, holding the edge with arms extended. Practice flutter kicking while keeping your face in the water, using your new breathing skills. Focus on: legs relatively straight, kicking from hips, ankles relaxed and floppy, small quick movements rather than large slow ones. Use a kickboard if available—hold it extended in front of you and kick across the pool.
Days 3-4 introduce arm movements. The freestyle arm stroke has three phases: entry (hand enters water in front of your shoulder), catch and pull (hand pulls water back past your body), and recovery (arm lifts out of water and returns forward). Practice arm movements while standing in shallow water first, then while holding a kickboard with one arm while the other practices the stroke.
Days 5-6 work on coordination. The challenge is combining kick, arm movement, and breathing. Start with single-arm drills: one arm extended holding a kickboard, the other arm stroking while you kick and breathe to the stroking side. This isolates the coordination challenge. Practice on both sides before attempting full arm coordination.
Day 7 focuses on putting it together. Attempt short distances (half pool length) of combined freestyle swimming. Don’t worry about perfection—focus on maintaining your breathing rhythm and continuous movement. By week’s end, you should be able to swim 10-15 meters of basic freestyle.
Week 3 Progress Checklist:
| Skill | Target | Your Progress |
| Flutter kick with board | Full pool length | [ ] Not started [ ] In progress [ ] Achieved |
| Flutter kick without board | Half pool length | [ ] Not started [ ] In progress [ ] Achieved |
| Arm stroke mechanics (stationary) | 20 repetitions each arm | [ ] Not started [ ] In progress [ ] Achieved |
| Single-arm drill with breathing | Half pool length each side | [ ] Not started [ ] In progress [ ] Achieved |
| Combined freestyle (basic) | 15 meters continuous | [ ] Not started [ ] In progress [ ] Achieved |
| Breathing coordination | Every 3 strokes | [ ] Not started [ ] In progress [ ] Achieved |
Week 4: Stroke Refinement and Building Endurance
Your final week focuses on refining your technique and building the endurance to swim continuously. By now, you have all the component skills—this week is about putting them together smoothly and extending your swimming distance.
Days 1-2 concentrate on stroke efficiency. Review each element of your freestyle: body position (horizontal, face down, hips high), kick (continuous, from hips, small movements), arm stroke (high elbow during recovery, long reach during entry, powerful pull), and breathing (side breathing, continuous exhale underwater, quick inhale). Video yourself if possible, or have an instructor observe and provide feedback.
Days 3-4 focus on bilateral breathing. Breathing on both sides (every 3 or 5 strokes) creates a more balanced stroke and is essential for open-water swimming. Practice the pattern: stroke, stroke, breathe right, stroke, stroke, breathe left. This rhythm may feel awkward initially but becomes natural with practice.
Days 5-6 build endurance through interval training. Swim one pool length (25 meters), rest for 30-60 seconds, repeat. Start with 4-6 lengths and gradually increase. Focus on maintaining good technique even when tired—poor form when fatigued reinforces bad habits. Include some backstroke practice as recovery swimming between freestyle efforts.
Day 7 is your graduation swim. Attempt to swim continuously for 25 meters (one full pool length) without stopping. Then, if successful, try 50 meters with a brief rest at the halfway point. Celebrate your progress—you’ve transformed from a non-swimmer to someone with genuine water competence in just four weeks.
Week 4 Progress Checklist:
| Skill | Target | Your Progress |
| Stroke efficiency review | All elements corrected | [ ] Not started [ ] In progress [ ] Achieved |
| Bilateral breathing | Every 3 strokes, 25 meters | [ ] Not started [ ] In progress [ ] Achieved |
| Continuous freestyle swim | 25 meters non-stop | [ ] Not started [ ] In progress [ ] Achieved |
| Endurance swim | 100 meters total (with rests) | [ ] Not started [ ] In progress [ ] Achieved |
| Treading water | 60 seconds | [ ] Not started [ ] In progress [ ] Achieved |
| Deep water confidence | Jump into deep water, tread, swim to side | [ ] Not started [ ] In progress [ ] Achieved |
Daily Practice Schedule Plan
Consistency is the most important factor in learning to swim as an adult. Three to four practice sessions per week, properly structured, will yield far better results than occasional marathon sessions. Below is a detailed daily practice schedule that you can adapt to your availability and energy levels.
| Session Phase | Duration | Activities | Purpose |
| Warm-Up | 5-10 minutes | Walking in water, gentle stretching, acclimatization | Prepare body and mind, reduce tension |
| Skill Review | 10-15 minutes | Practice previously learned skills | Reinforce muscle memory, build confidence |
| New Skill Focus | 20-25 minutes | Learn and practice new technique | Progress development |
| Integration | 10-15 minutes | Combine skills, swim short distances | Coordinate all elements |
| Cool-Down | 5-10 minutes | Relaxed floating, gentle swimming | Consolidate learning, end positively |
Each practice session should follow this general structure, but the specific activities will vary based on which week of the program you’re in. The warm-up phase is particularly important for adults—cold muscles are more prone to injury, and a gradual warm-up helps you mentally transition into the learning space.
The skill review portion might seem repetitive, but it’s essential for building automatic responses. When you’re in the middle of swimming and need to breathe, you don’t want to think about the mechanics—you want your body to respond automatically. This automaticity only comes through repetition.
Always end your practice with something you do well. This positive ending reinforces your progress and keeps you motivated for the next session. Swimming is as much psychological as physical, especially for adults overcoming fear.
Floating Techniques Explained in Detail
Understanding floating is fundamental to swimming. Many adults believe they “can’t float” due to body composition, but this is almost never true. Human bodies are naturally buoyant due to the air in our lungs. The reason people sink is almost always related to tension, body position, or breathing—not body type.
The Science of Floating
Buoyancy is determined by Archimedes’ principle: an object in water experiences an upward force equal to the weight of water it displaces. Your body displaces a certain volume of water; if that water weighs more than you do, you float. For most people, a full breath of air makes them slightly positively buoyant—they float with a small portion of their body above water.
Body composition does affect buoyancy minimally. Muscle is denser than fat, so very muscular individuals may float slightly lower in the water. Bone density also plays a role. However, these factors are minor compared to the effect of lung volume and body position. Even the densest human body will float with lungs full of air—it just might float with less of the body above the surface.
Front Float (Prone Float / Star Float)
The front float is your foundation for freestyle swimming. Here’s the detailed technique: Start in chest-deep water, facing the pool wall. Take a deep breath and hold it. Place your face in the water, looking straight down at the pool bottom. Extend your arms forward, shoulder-width apart or slightly wider. Extend your legs behind you, hip-width apart. Relax every muscle completely.
Common mistakes to avoid: Lifting your head to look forward (this causes your hips to sink). Tensing your neck or back muscles. Bending at the waist. Holding your breath too long and panicking. Kicking or moving (floating is passive). The key is complete relaxation—tense muscles are denser and sink more easily.
Practice progression: Start with wall support (hands on pool edge), then progress to a kickboard for support, then try independent floating. Aim for 30 seconds of relaxed floating before moving on. If you feel your legs sinking, try tilting your head down further or pressing your chest toward the pool bottom—this counterintuitive move often raises sinking legs.
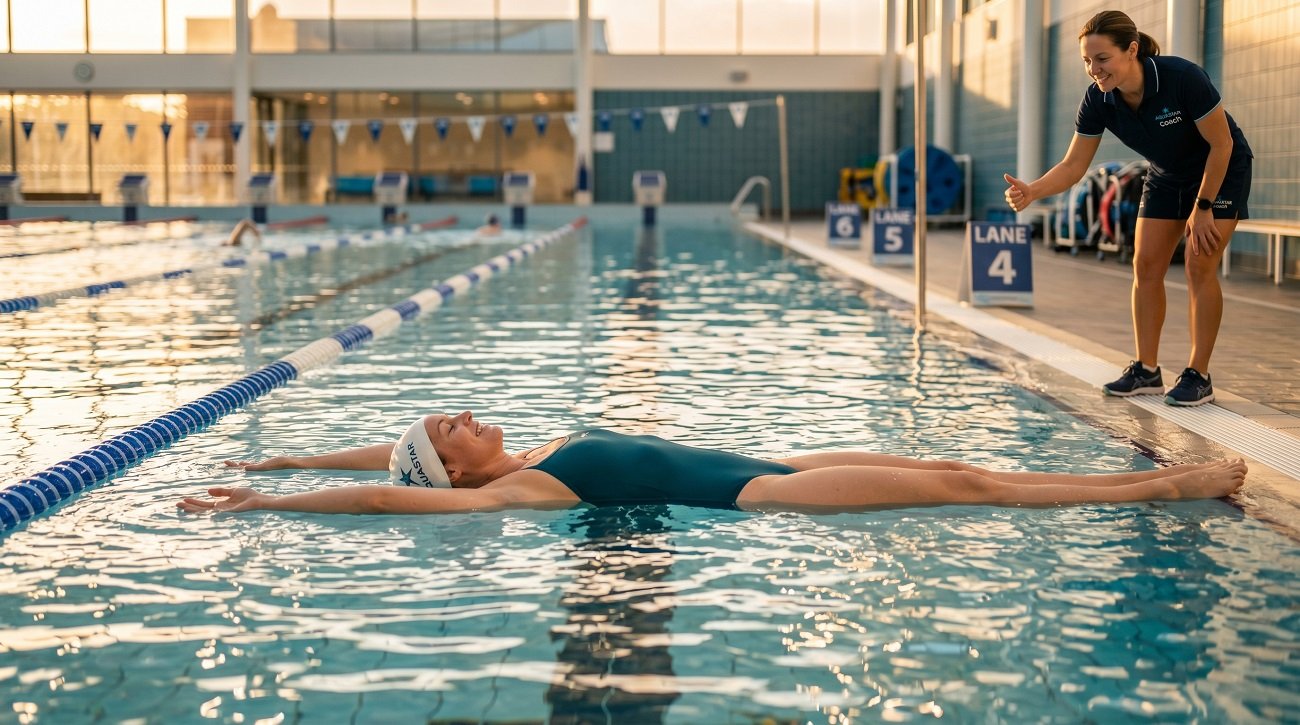
Back Float (Supine Float)
The back float is essential for rest and recovery during swimming, and many adults find it easier than front floating because their face remains above water. The technique: Start in chest-deep water, facing away from the wall. Take a deep breath and hold it. Lean back, looking up at the sky or ceiling. Extend your arms to the sides at approximately 45-degree angles. Extend your legs, keeping them relaxed and slightly apart. Keep your ears underwater—this is crucial.
The most common mistake is lifting the head. When you lift your head to look at your feet or check your position, your hips sink immediately. Trust that the water will support you. Your head should be back far enough that water covers your ears and touches your hairline. If water washes over your face, tilt your head back further.
Practice progression: Start with a partner supporting your back, then progress to using a noodle under your shoulders, then try independent floating. The goal is 30-60 seconds of relaxed back floating. Practice transitioning from front float to back float and back—this skill is essential for rest during longer swims.
Front Float vs. Back Float Comparison:
| Aspect | Front Float | Back Float |
| Face position | In water, looking down | Out of water, looking up |
| Arm position | Extended forward | Extended to sides at 45 degrees |
| Leg position | Extended behind, hip-width | Extended, relaxed, slightly apart |
| Primary challenge | Breath holding, face in water | Head position, trust |
| Best for | Freestyle foundation, streamline | Rest, recovery, breathing |
| Common mistake | Lifting head, tensing back | Lifting head, tensing neck |
| Practice aid | Kickboard, wall support | Noodle, partner support |
Breathing Techniques & Drills
Breathing is the most challenging aspect of swimming for most adults, and it’s also the most important. Without proper breathing technique, you’ll tire quickly, feel anxious, and never develop the relaxed, efficient stroke that makes swimming enjoyable. The good news is that breathing technique can be practiced both in and out of the water.
The Golden Rule: Exhale Underwater
The single most important breathing principle in swimming is this: always exhale while your face is underwater. This seems counterintuitive—shouldn’t you hold your breath to conserve air? Actually, no. Holding your breath underwater creates several problems: it builds up CO2 in your lungs, creating a suffocation feeling; it means you must both exhale and inhale during the brief moment your face is out of water; and it creates tension throughout your body.
Instead, practice continuous exhalation. As soon as your face enters the water, begin exhaling through your nose or mouth. Continue exhaling steadily until you turn your head to breathe. When you surface, your lungs are empty and ready for a quick inhale. This rhythm—exhale underwater, inhale above water—should become automatic.
Breathing Timing and Rhythm
In freestyle swimming, breathing timing is critical. You should begin turning your head to breathe as the arm on the breathing side begins its recovery (exits the water). Your face should surface just as that arm passes your head. Inhale quickly through your mouth, then begin turning your face back into the water as that arm enters the water in front of you.
The timing should feel like a natural rotation of your body, not a separate head movement. Your head turns because your body rotates—not independently. This is why practicing side breathing while holding the wall is so valuable: it teaches you to breathe to the side without lifting your head.
Essential Breathing Drills
Drill 1 – Stationary Rhythmic Breathing: Stand in chest-deep water. Inhale through your mouth above water. Submerge face and exhale through nose for 3-5 seconds. Surface and inhale. Repeat 20 times. Progress to continuous rhythm without pausing at the surface.
Drill 2 – Bobbing: In water at least chest-deep, take a breath, submerge completely, exhale underwater, push off the bottom to surface, inhale, repeat. This teaches you that you can breathe even when fully submerged and builds confidence in deeper water.
Drill 3 – Wall Side Breathing: Hold pool edge with one hand, extend body horizontally. Turn head to side (not lifting), inhale quickly. Return face to water, exhale continuously. Repeat 10 times on each side. Focus on keeping one goggle in the water during the breath.
Drill 4 – Kickboard Breathing: Hold kickboard extended in front. Kick while face is in water, exhaling continuously. Turn head to side to breathe, inhale, return face to water. Practice breathing every 6 kicks (approximately every 3 seconds).
Drill 5 – Single-Arm Breathing: One arm holds kickboard, other arm strokes. Breathe to the stroking side. This isolates the breathing coordination challenge. Practice on both sides.
Beginner Swimming Drills
Drills break down complex swimming movements into manageable components. By practicing drills, you can focus on specific aspects of your technique without the cognitive load of coordinating everything at once. Here are the essential drills for beginner swimmers, organized by skill area.
Kick Drills
Wall Kick: Hold the pool edge with arms extended, face in water, body horizontal. Flutter kick for 30-60 seconds. Focus on: legs relatively straight, kicking from hips, small splash, continuous movement. This drill isolates kick mechanics without the distraction of breathing or arm movement.
Kickboard Kick: Hold a kickboard extended in front, arms relaxed. Kick across the pool with face in water, practicing breathing to the side. This adds the breathing challenge while still isolating the kick. Progress to kicking without the board (arms extended in streamline position).
Vertical Kick: In deep water, hold a noodle or remain vertical and flutter kick to keep your head above water. This develops kick strength and teaches you to kick from your hips rather than your knees. Start with support and progress to unsupported vertical kicking.
Arm Movement Drills
Standing Arm Strokes: Stand in shallow water, bend at waist so shoulders are underwater. Practice arm stroke mechanics: reach forward, catch the water, pull back past your body, lift arm out of water (high elbow), reach forward again. Focus on the “catch”—the moment your hand grips the water.
Single-Arm Drill: Hold a kickboard with one arm extended. Stroke with the other arm while kicking and breathing to the stroking side. This isolates arm mechanics and breathing coordination. Do 25 meters with each arm.
Catch-Up Drill: Start with both arms extended in front. Stroke with one arm, return it to the front position, then stroke with the other arm. Each arm “catches up” to the other before the next stroke begins. This slows down the stroke and emphasizes proper arm position.
Coordination Drills
6-Kick Switch: Push off wall in streamline position. Kick 6 times on your left side (left arm extended, right arm at side). Take one stroke and rotate to your right side. Kick 6 times on right side. Repeat across the pool. This develops body rotation and side breathing.
3-Strokes-6-Kicks: Take 3 freestyle strokes, then kick on your side for 6 kicks (bottom arm extended, top arm at side). Take 3 more strokes, kick on the other side. This drill combines swimming with the side-kicking position, building coordination.
Fist Drill: Swim freestyle with closed fists. This forces you to use your forearm for propulsion and develops a better “catch” feel. When you open your hands again, you’ll have a stronger sense of gripping the water.
Common Mistakes Beginners Make (And How to Avoid Them)
Understanding common mistakes helps you avoid them—or recognize and correct them if you’ve already developed bad habits. Here are the most frequent errors we see in adult swimming students, along with specific corrections.
Mistake 1: Holding Your Breath Underwater
This is the most common and most problematic mistake. Holding your breath while your face is underwater creates a suffocation response, builds CO2 in your lungs, and forces you to try exhaling and inhaling in the brief moment your face is above water. The result: you feel breathless, anxious, and exhausted quickly.
Correction: Practice continuous exhalation. As soon as your face enters the water, begin exhaling through your nose or mouth. Continue until you surface to breathe. Your lungs should be empty when you surface, ready for a quick inhale. Practice stationary rhythmic breathing until this becomes automatic.
Mistake 2: Lifting Your Head to Breathe
When you lift your head to breathe, your hips sink immediately. This destroys your body position, creates drag, and makes swimming much harder. It also leads to neck strain and reinforces the fear response.
Correction: Practice side breathing. Your head should rotate with your body, not lift independently. One goggle should remain in the water when you breathe. Think about rotating to look at your shoulder rather than lifting your chin. Practice wall side breathing until this movement becomes natural.
Mistake 3: Kicking from the Knees (Bicycle Kick)
Bending your knees excessively and kicking from the knee joint rather than the hip creates a “bicycle” motion that is inefficient and tiring. It also causes your hips to sink, ruining your body position.
Correction: Kick from your hips with relatively straight legs. Your knees should bend only slightly—imagine your legs are relatively straight but relaxed. Focus on making small splashes rather than big ones. Practice wall kicks while thinking about initiating the movement from your hip joint.
Mistake 4: Swimming Too Fast
Many beginners rush their strokes, trying to get across the pool as quickly as possible. This leads to poor technique, rapid fatigue, and a negative experience. Swimming is not about speed—it’s about efficiency.
Correction: Slow down. Focus on technique rather than speed. A slow, efficient stroke is far more effective than a fast, inefficient one. Practice drills that force you to slow down, like catch-up drill and 6-kick switch.
Mistake 5: Crossing Over the Center Line
When your hand enters the water in front of your head and crosses over to the opposite side of your body, it creates rotation problems and can lead to shoulder impingement. Your hand should enter in line with your shoulder.
Correction: Practice single-arm drills with focus on hand entry position. Imagine a line down the center of your body—your hands should never cross this line. Video yourself or have an instructor watch to identify this mistake.
Mistake 6: Looking Forward Instead of Down
Looking forward (toward the end of the pool) while swimming forces your head up, which drops your hips. This creates significant drag and makes swimming much harder.
Correction: Look straight down at the pool bottom. Your head should be positioned so that the water line is at the top of your head (or your hairline). This neutral head position allows your hips to rise, creating an efficient body position.
Quick Reference: Common Mistakes and Corrections:
| Mistake | Problem | Correction | Practice Drill |
| Holding breath underwater | CO2 buildup, breathlessness | Continuous exhalation | Stationary rhythmic breathing |
| Lifting head to breathe | Hips sink, drag increases | Side breathing, rotate with body | Wall side breathing |
| Kicking from knees | Inefficient, hips sink | Kick from hips, straight legs | Wall kicks, vertical kicks |
| Swimming too fast | Poor technique, fatigue | Slow down, focus on efficiency | Catch-up drill |
| Crossing center line | Rotation problems, injury risk | Enter at shoulder line | Single-arm drill |
| Looking forward | Head up, hips down | Look straight down | Streamline kicking |
Progress Tracking Checklist
Tracking your progress is essential for motivation and for identifying areas that need more attention. Use this comprehensive checklist to monitor your development throughout the 4-week program and beyond.
Week 1 Milestones
• Comfortable standing and moving in chest-deep water
• Can submerge face for 10+ seconds without panic
• Performs 10 consecutive bobs with rhythmic breathing
• Holds wall-supported front float for 30 seconds
• Attempts independent front float (any duration)
• Demonstrates relaxed body position in water
Week 2 Milestones
• Performs 20+ stationary breathing cycles without stopping
• Side breathes at wall for 10 repetitions each side
• Holds independent back float for 20+ seconds
• Transitions smoothly between front and back float
• Maintains breathing rhythm while floating
• Shows increased comfort in deeper water
Week 3 Milestones
• Kicks with kickboard for full pool length
• Kicks without board for half pool length
• Demonstrates proper arm stroke mechanics
• Completes single-arm drill on both sides
• Swims 15+ meters of basic freestyle
• Coordinates breathing with stroke rhythm
Week 4 Milestones
• Swims 25 meters freestyle without stopping
• Demonstrates bilateral breathing (every 3 strokes)
• Completes 100 meters total swimming (with rests)
• Treads water for 60+ seconds
• Jumps into deep water and returns to side safely
• Shows confidence and relaxation while swimming
Printable Beginner’s Quick Reference Checklist
Print this section and bring it to the pool as a quick reference guide during your practice sessions.
| Category | Item | Check |
| Before Swimming | Arrive early to acclimate to pool environment | [ ] |
| Before Swimming | Use restroom, shower, and secure swim cap/goggles | [ ] |
| Before Swimming | Do 5 minutes of gentle stretching on deck | [ ] |
| Before Swimming | Set specific goals for today’s practice | [ ] |
| Water Entry | Enter via ladder or stairs, not jumping (unless practicing) | [ ] |
| Water Entry | Walk to appropriate depth for planned activities | [ ] |
| Water Entry | Take 30 seconds to acclimate before starting | [ ] |
| Warm-Up | Walk in waist-deep water for 2 minutes | [ ] |
| Warm-Up | Submerge and wet face, neck, shoulders | [ ] |
| Warm-Up | Practice 5 bobs to establish breathing rhythm | [ ] |
| Floating Practice | Front float: face down, arms/legs extended, relax | [ ] |
| Floating Practice | Back float: ears underwater, look up, relax | [ ] |
| Floating Practice | Practice transitions between front and back | [ ] |
| Breathing Focus | Exhale continuously underwater through nose | [ ] |
| Breathing Focus | Inhale quickly when face surfaces | [ ] |
| Breathing Focus | Practice side breathing at wall | [ ] |
| Kick Practice | Kick from hips, legs relatively straight | [ ] |
| Kick Practice | Small splashes, continuous movement | [ ] |
| Kick Practice | Practice with and without kickboard | [ ] |
| Stroke Practice | Arm entry at shoulder line, not crossing center | [ ] |
| Stroke Practice | High elbow during recovery phase | [ ] |
| Stroke Practice | Powerful pull past body | [ ] |
| Cool-Down | End with something you do well | [ ] |
| Cool-Down | Practice relaxed floating for 1-2 minutes | [ ] |
| Cool-Down | Note progress and areas for improvement | [ ] |
Dryland Exercises to Improve Swimming
What you do out of the water significantly impacts your swimming progress. Dryland exercises build the strength, flexibility, and body awareness that translate directly to improved swimming performance. These exercises are particularly valuable for adults, who may have less natural flexibility and mobility than younger swimmers.
Core Strength Exercises
A strong core is essential for maintaining horizontal body position in the water. Without core strength, your hips tend to sink, creating drag and making swimming much harder.
Plank: Hold a front plank position for 30-60 seconds. Focus on keeping your body in a straight line from head to heels—this is the same position you want in the water. Progress to side planks, 30 seconds each side, to develop the rotational strength needed for freestyle.
Dead Bug: Lie on your back with arms extended toward ceiling and legs in tabletop position (90 degrees at hips and knees). Slowly extend opposite arm and leg toward the floor, then return. This exercise teaches you to maintain core stability while moving your limbs—the exact challenge of swimming.
Bird Dog: Start on hands and knees. Extend opposite arm and leg, hold for 3 seconds, return. This develops core stability and coordination. Focus on keeping your back flat—no arching or sagging.
Shoulder Mobility and Strength
Swimming places unique demands on the shoulders. These exercises prepare your shoulders for the repetitive motion and help prevent injury.
Arm Circles: Stand with arms extended to sides. Make small circles forward for 30 seconds, then backward for 30 seconds. Gradually increase circle size. This warms up the shoulder joint and improves mobility.
Shoulder Blade Squeezes: Sit or stand with arms at sides. Squeeze shoulder blades together, hold for 5 seconds, release. Repeat 10 times. This strengthens the muscles that stabilize your shoulder blade during the swimming stroke.
Wall Angels: Stand with back against wall, arms in “goalpost” position (elbows at 90 degrees, upper arms at shoulder height). Slowly slide arms up the wall, then down. Keep your lower back pressed against the wall throughout. This improves shoulder mobility and posture.
Leg Strength for Kicking
Strong legs provide propulsion and help maintain body position. These exercises target the muscles used in flutter kicking.
Squats: Stand with feet shoulder-width apart. Lower into a squat, keeping weight in heels and knees tracking over toes. Return to standing. Start with bodyweight squats, progress to adding weight. Aim for 3 sets of 10-15 repetitions.
Lunges: Step forward into a lunge, lowering back knee toward floor. Push back to standing. Alternate legs. This develops leg strength and hip mobility. Aim for 10 lunges per leg.
Glute Bridges: Lie on back with knees bent, feet flat on floor. Lift hips toward ceiling, squeezing glutes at the top. Lower and repeat. This strengthens the glutes, which are essential for powerful kicking. Aim for 3 sets of 15 repetitions.
Flexibility and Recovery
Flexibility exercises should be done after swimming or as a separate session, not before (pre-swim stretching should be dynamic, not static).
Chest Stretch: Stand in a doorway with arms on the door frame at shoulder height. Step forward gently until you feel a stretch across your chest. Hold for 30 seconds. Swimming involves a lot of chest muscle use; this stretch helps prevent tightness.
Lat Stretch: Hold onto a wall or post with one arm extended. Sit back until you feel a stretch along the side of your body from armpit to hip. Hold for 30 seconds each side. The latissimus dorsi is the primary pulling muscle in swimming.
Hip Flexor Stretch: Kneel on one knee, other foot in front. Push hips forward until you feel a stretch in the front of the hip on the kneeling side. Hold for 30 seconds each side. Tight hip flexors are common in adults and can limit kicking range of motion.
Nutrition & Hydration Tips for Swimmers
Proper nutrition and hydration significantly impact your swimming performance and recovery. While you don’t need to follow an elite athlete’s diet, paying attention to what you eat and drink before and after swimming can make your practice sessions more effective and enjoyable.
Pre-Swim Nutrition
What you eat before swimming affects your energy levels and comfort during your session. The goal is to have adequate fuel without feeling heavy or experiencing digestive issues.
2-3 Hours Before Swimming: Eat a balanced meal containing complex carbohydrates, lean protein, and some healthy fat. Examples include: oatmeal with fruit and nuts; whole grain toast with eggs; brown rice with chicken and vegetables; or a turkey sandwich on whole grain bread. This timing allows for digestion before you enter the water.
30-60 Minutes Before Swimming: If you need a pre-swim snack, choose easily digestible carbohydrates. Good options include: a banana; a small portion of pretzels or crackers; a sports drink; or an energy bar (avoid high-protein or high-fat bars close to swimming). Avoid heavy, fatty, or high-fiber foods immediately before swimming.
What to Avoid Before Swimming: High-fat foods (they slow digestion), high-fiber foods (can cause digestive discomfort), large portions (can cause cramping), and dairy (some swimmers find it causes congestion). Everyone is different—experiment to find what works for your body.
Post-Swim Nutrition
After swimming, your body needs to replenish energy stores and repair muscle tissue. Aim to eat within 30-60 minutes of finishing your swim.
The ideal post-swim meal or snack combines carbohydrates (to replenish glycogen) and protein (to repair muscle). Good options include: chocolate milk (excellent carb-protein ratio); Greek yogurt with fruit; a turkey and cheese sandwich; a smoothie with protein powder, fruit, and spinach; or eggs with whole grain toast.
If you swim in the morning, breakfast becomes your recovery meal. If you swim in the evening, plan a balanced dinner afterward. Don’t skip eating after swimming—your body is primed to absorb nutrients and recover.
Hydration
Swimming is deceptive—you’re surrounded by water, so you may not realize you’re sweating and becoming dehydrated. Proper hydration is essential for performance and safety.
Before Swimming: Drink 16-20 ounces of water 2-3 hours before swimming, and another 8 ounces 20-30 minutes before entering the water. Start your session well-hydrated.
During Swimming: For sessions under an hour, water is sufficient. For longer sessions or hot pool environments, consider a sports drink with electrolytes. Keep a water bottle at poolside and drink during rest periods.
After Swimming: Weigh yourself before and after swimming (if possible) to determine fluid loss. Drink 16-24 ounces for every pound lost. Even without weighing, aim to drink at least 16-24 ounces after your session. Urine color is a good indicator—pale yellow indicates good hydration.
Swimmer’s Nutrition Quick Guide:
| Timing | Goal | Recommended Foods |
| 2-3 hours before | Balanced fuel | Oatmeal with fruit, eggs with toast, rice with lean protein |
| 30-60 min before | Quick energy | Banana, pretzels, sports drink, energy bar |
| During (if needed) | Hydration | Water for <1 hour, sports drink for longer sessions |
| Within 30 min after | Recovery | Chocolate milk, yogurt with fruit, sandwich, smoothie |
| Throughout day | Overall nutrition | Balanced meals with lean protein, complex carbs, vegetables |
Expert Tips for Faster Progress
Beyond the structured program, these expert insights can accelerate your progress and help you get the most from your swimming journey.
Tip 1: Practice Consistency Over Intensity
Three shorter, focused practice sessions per week will yield better results than one long session. Your brain and body need repetition to develop new movement patterns. A 45-minute session 3-4 times per week is ideal for most adults. If you can only manage twice a week, that’s still valuable—just expect slower progress.
Tip 2: Invest in Quality Instruction
Even a few sessions with a qualified instructor can dramatically accelerate your progress. An instructor can identify issues you can’t see yourself, provide immediate feedback, and give you confidence that you’re practicing correctly. At Focus Camp, we’ve seen adults progress in 2-3 lessons what might take months of self-teaching.
Tip 3: Use Video Analysis
Have someone video you swimming (most pools allow this). Watching yourself swim is incredibly revealing—you’ll see mistakes you didn’t know you were making. Compare your video to instructional videos online. This self-awareness is one of the most powerful tools for improvement.
Tip 4: Practice Mental Rehearsal
Visualize yourself swimming with perfect technique. Before sleep, imagine the feeling of floating effortlessly, breathing rhythmically, and moving smoothly through the water. This mental practice reinforces neural pathways and can improve your actual swimming.
Tip 5: Focus on One Thing at a Time
Don’t try to fix everything at once. Pick one element to focus on during each practice session—today is breathing day, tomorrow is kick day, etc. This focused attention is more effective than trying to monitor everything simultaneously.
Tip 6: Embrace the Process
Learning to swim as an adult takes time. There will be frustrating days when you feel like you’re regressing. This is normal. Progress is rarely linear. Trust the process, celebrate small victories, and remember that every swimmer—Olympians included—started as a beginner.
Tip 7: Swim with Others
Joining a beginner swim group or finding a swim buddy provides motivation, accountability, and the opportunity to learn from others. Plus, swimming becomes more enjoyable when it’s a social activity. Many pools in Los Angeles offer adult beginner classes—consider joining one.
Tip 8: Address Fear Directly
If fear of water is holding you back, address it directly rather than trying to push through. Consider working with an instructor who specializes in aquaphobia. Practice relaxation techniques before and during swimming. Remember that fear is a normal response to an unfamiliar environment—it will decrease with positive experiences.
Common Injuries & How to Prevent Them
Swimming is generally one of the safest forms of exercise, but injuries can occur, particularly with poor technique or overtraining. Understanding common swimming injuries helps you prevent them and recognize when to seek treatment.
Swimmer’s Shoulder (Shoulder Impingement)
Swimmer’s shoulder is the most common swimming injury, caused by repetitive overhead arm motion combined with poor technique. Symptoms include pain at the front or side of the shoulder, particularly during the recovery phase of the stroke, and pain that worsens with continued swimming.
Prevention: Focus on proper technique—especially avoiding crossing the center line with your hand entry and maintaining a high elbow during recovery. Strengthen your rotator cuff and shoulder blade stabilizers with dryland exercises. Avoid sudden increases in training volume. Include rest days in your training schedule.
Lower Back Pain
Lower back pain in swimmers often results from excessive arching of the lower back during swimming, particularly in breaststroke and butterfly. It can also occur from poor core strength, which forces the lower back to work harder to maintain body position.
Prevention: Maintain a neutral spine position while swimming—avoid overarching. Develop core strength through dryland exercises. If you experience back pain, reduce breaststroke and butterfly, which place more stress on the lower back. Consider having your technique evaluated by an instructor.
Knee Pain (Breaststroker’s Knee)
The whip kick used in breaststroke places stress on the inside of the knee, which can cause pain and injury over time. This is primarily a concern for swimmers who do significant breaststroke training.
Prevention: Ensure proper breaststroke kick technique—the power should come from rotating the legs at the hips, not from the knees. Limit breaststroke training volume, especially when learning. Strengthen the muscles around the knee with dryland exercises. If you experience knee pain, reduce breaststroke and focus on freestyle.
Neck Strain
Neck strain often results from lifting the head to breathe or looking forward while swimming. This creates tension in the neck muscles and can lead to pain and headaches.
Prevention: Maintain a neutral head position—look down, not forward. Breathe by rotating your body, not by lifting your head. Keep your neck relaxed throughout the stroke. If you experience neck pain, have your breathing technique evaluated.
Ear Infections (Swimmer’s Ear)
Swimmer’s ear is an infection of the outer ear canal caused by water remaining in the ear after swimming. Symptoms include ear pain, itching, and sometimes discharge.
Prevention: Dry your ears thoroughly after swimming—tilt your head to each side and gently pull your earlobe to help water drain. Consider using ear drops designed to dry the ear canal (available at pharmacies). Use ear plugs if you’re prone to ear infections. Avoid swimming in water with high bacteria counts.
Injury Prevention Quick Reference:
| Injury | Primary Cause | Key Prevention |
| Swimmer’s Shoulder | Poor technique, overuse | Proper hand entry, rotator cuff exercises |
| Lower Back Pain | Excessive arching, weak core | Neutral spine, core strengthening |
| Knee Pain | Improper breaststroke kick | Correct technique, limit breaststroke |
| Neck Strain | Lifting head to breathe | Side breathing, neutral head position |
| Swimmer’s Ear | Water in ear canal | Dry ears after swimming, ear drops |
Self-Learning vs. Focus Camp Professional Coaching
One of the most important decisions you’ll make in your swimming journey is whether to learn independently or work with a professional coach. Both approaches have merit, and the best choice depends on your goals, budget, and learning style. Here’s an honest comparison to help you decide.
Self-Learning: Pros and Cons
Advantages of self-learning include complete flexibility in scheduling—you can practice whenever the pool is open and you have time. There’s no financial cost beyond pool access, making it accessible to everyone. You progress at your own pace without pressure, and the process can build self-reliance and problem-solving skills.
However, self-learning has significant limitations. Without expert feedback, you may develop and reinforce poor technique that becomes harder to correct later. Progress is typically slower because you’re figuring things out through trial and error. You may miss important safety considerations or foundational skills. Motivation can be challenging to maintain without external accountability. And for adults with fear of water, self-learning may not provide the emotional support needed to overcome anxiety.
Professional Coaching: Pros and Cons
Working with a qualified coach, like those at Focus Camp, offers numerous advantages. You receive immediate, personalized feedback that accelerates learning and prevents bad habits. Coaches can identify issues you can’t see yourself and provide specific corrections. The structured progression ensures you build skills in the optimal order. For anxious swimmers, a coach provides emotional support and creates a safe environment for facing fears. Accountability helps maintain consistency. And you’ll learn proper technique from the start, avoiding the need to unlearn mistakes later.
The primary disadvantage is cost—professional instruction requires financial investment. Scheduling must accommodate instructor availability. And some people feel self-conscious about being “taught” as adults, though this typically fades quickly.
Detailed Comparison: Self-Learning vs. Professional Coaching:
| Factor | Self-Learning | Focus Camp Coaching |
| Cost | Pool access only ($5-15/session) | Higher investment, faster results |
| Schedule | Complete flexibility | Must coordinate with instructor |
| Feedback | None (or delayed via video) | Immediate, personalized |
| Progress Speed | Slower, trial and error | Faster, structured progression |
| Technique Quality | Risk of developing bad habits | Proper technique from start |
| Fear Support | Limited | Specialized support available |
| Accountability | Self-motivation required | Built-in accountability |
| Safety | Self-monitored | Professional oversight |
| Best For | Confident, self-motivated learners | Most adults, especially beginners |
Our Recommendation
For most adults learning to swim, we recommend at least a few sessions with a qualified instructor, even if you plan to do most of your practice independently. The foundation you build in those initial sessions will serve you throughout your swimming life. At Focus Camp, we offer flexible options ranging from intensive packages to occasional check-in sessions, allowing you to get professional guidance at whatever level fits your needs and budget.
If you’re in the Los Angeles area, we invite you to experience the Focus Camp difference. Our coaches specialize in adult learners and understand the unique challenges you face. We meet you where you are—whether that’s standing nervously at the pool’s edge or ready to refine your technique—and guide you toward genuine water confidence.
Your Swimming Journey Starts Now
Learning to swim as an adult is one of the most rewarding investments you can make in yourself. Beyond the practical benefits—safety, fitness, access to water activities—you’ll gain confidence that extends far beyond the pool. The process of facing fear, learning new skills, and achieving goals transforms not just your swimming ability but your sense of what’s possible.
This 4-week plan provides a comprehensive roadmap, but remember that every journey is unique. Some adults progress faster than four weeks; others need more time. Both are normal. What matters is consistent effort and a willingness to be patient with yourself.
The skills you develop—floating, breathing, moving through water—will serve you for the rest of your life. Whether you’re swimming laps for fitness, playing with children at the beach, or simply enjoying the meditative quality of being in water, you’ll have the foundation to participate fully and safely.
If you’re ready to begin your swimming journey, we’re here to help. Focus Camp offers personalized coaching for adults at all levels, from complete beginners to those looking to refine their technique. Our approach combines technical expertise with genuine understanding of the adult learning process. Contact us to learn more about our programs, or visit our website to explore our full range of fitness and wellness offerings.
The water is waiting. Take that first step—you won’t regret it.
READY TO START YOUR SWIMMING JOURNEY?
Contact Focus Camp Today
Phone: (323) 595-3766 | E-mail: info@focuscamp1.com